Xantia Activa Leaky Ram Repairs: Page 1

-
Leaky Activa Rams are a very common problem which can lead to an MOT failure and new replacements are very expensive; in the region of £400 each, and often lead to the car being scrapped.
-
Jack and firmly support the front of the car. Then set the suspension on low and depressurise the hydraulics in the normal way. PLEASE ENSURE THE CAR IS ADEQUATELY SUPPORTED AS YOU WILL BE SPENDING TIME UNDERNEATH IT ON YOUR BACK.
-
Remove the nearside wheel. Clean up the threads on the top and bottom ram balljoints with a wire brush, ensuring you remove all dirt and rust. Then douse the threads in Plus-Gas or a similar releasing fluid.
-
Counterhold the balljoint threads with a 5mm Allen key and loosen the 18mm balljoint nuts. Do not fully remove the nuts just yet and if they get very tight due to the "Nyloc" inserts binding, do them up again and then undo them in small backwards and forwards movements until they are nicely free. There is a risk of rounding the small 5mm counterholding hexagon if you don't. Finally, compress the ram as much as possible by jacking on the bottom balljoint to expel most of the LHM from the ram.
-
Remove the 10mm clamp plate nut holding the flexible high pressure pipes to their mounting plate and remove the clamp plate. Disconnect the leakage return pipe. Note carefully which high pressure pipe goes to which rigid pipe union and which flexi pipe goes to which union on the ram. Note also the two flexi pipes are of different lengths. Counterholding the 21mm hexagons on the flexi pipes, loosen the union nut on the rigid pipes using a 17mm flare nut spanner. These may be very tight and suffering from corrosion. Disconnect the flexi pipes and seal off the ends of the rigid pipes. Be prepared for a spill of LHM.
-
Remove the ram by removing the balljoint nuts, noting there is a washer on the top joint only, and threading the ram out from behind the handbrake cable. Keep the ram compressed during removal as much as possible to avoid spilling too much LHM and making a mess. Once out, pump the ram over a dish to expel any remaining LHM from the ram.
-
Replacemnt is a reversal of removal but note that the long flexi pipe must be fitted to the front union on the ram as you look at it in its fitted position. The long pipe must connect to the right-hand (as you look at it) rigid pipe.
-
Removal and refitting of the rear ram is a much more difficult task and is fully described here.
-
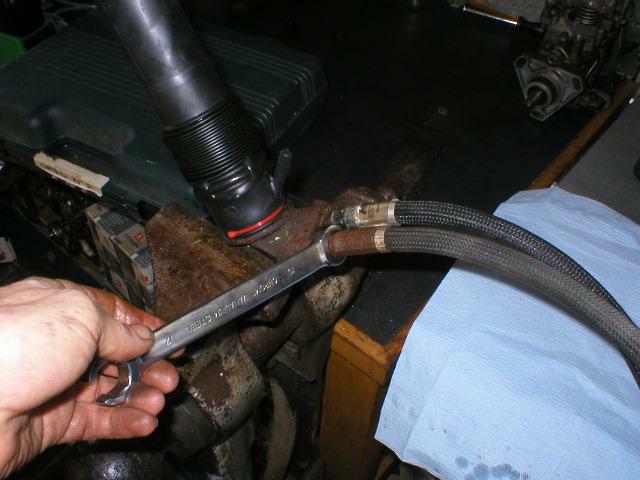
Clamp the ram in a vice and remove the flexi pipes. These will be tight and sadly a flare nut spanner cannot be used on the 13mm (front, the rears are 15mm) hexagons. Use a very good close fitting open eneded spanner with wide jaws or modify a flare nut spanner to fit the hexagon, taking advantage of the generally wider jaws on a flare nut spanner. I find it best to jar the unions free by bumping the end of the spanner with your fist.

Undoing the Ram Flexi-Pipes
- Now is a good time to test the ram and ensure it is in good condition hydraulically. Seal the two flexi-pipe unions on the ram body with plastic plugs and pump the ram vigourously. You should feel significant resistance and finally an inability to pump it at all. One of the plugs may pop out with some vigour. If this is the case, the ram is good. If little resistance is felt despite many pumps, the ram is likly to have a scored piston rod and is unfortunately scrap.
Fortunately, most can be repaired at a cost of less than £10 and a few hours of work.
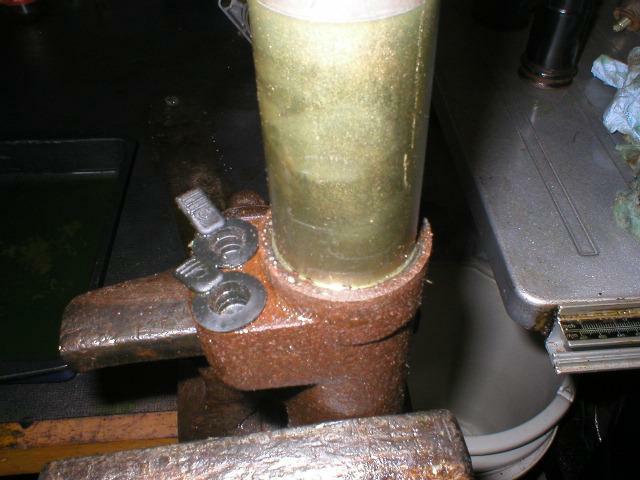
The most common reason for leaks on both the front and rear rams is either a failed seal at the leakage return collar due to corrosion attacking the collar sealing surfaces or cracks in the small return pipe spigot on the collar. The ram proper is usually quite OK and the leakage of LHM is simply a result of the collar not adequately sealing. The picture below shows how corrrosion has got under the collar and destroyed the sealing surface.

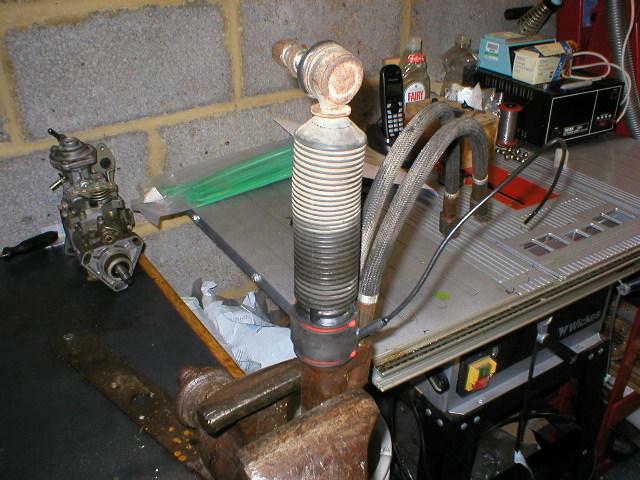
Below is a repaired front ram ready for reinstallation onto the car. This ram has been repaired by replacing the old leakage return collar with a substitute Citroen XM Steering Ram Leakage Return Collar. This component is available from Citroen Dealers under Part. No. 95 640 212 at a cost of less then £10 each.

To complete the job, you will need, in addition to the XM Collar, the following: Two normal Citroen sphere seals, some small cable ties, superglue and some wide sellotape. In addition to the normal tools, you will need a 17mm flare nut spanner, a 21mm open ended spanner, a bearing puller and two-legged universal puller and cheap 14mm and 19mm open ended spanners you are prepared to modify in order to remove and replace the ram balljoints. A small screwdriver is also useful.
The front ram will be dealt with first as it is the most difficult. The rear ram is repaired in a similar way but is a lot easier. Firstly, a few notes on removing the front ram...

