Xantia Activa Rear Ram Replacement: Page 3

This is quite a tricky job and it is made even more difficult because of restricted access to the ram hydraulic unions. Allow at least a day if this is the first time to do the job.
-
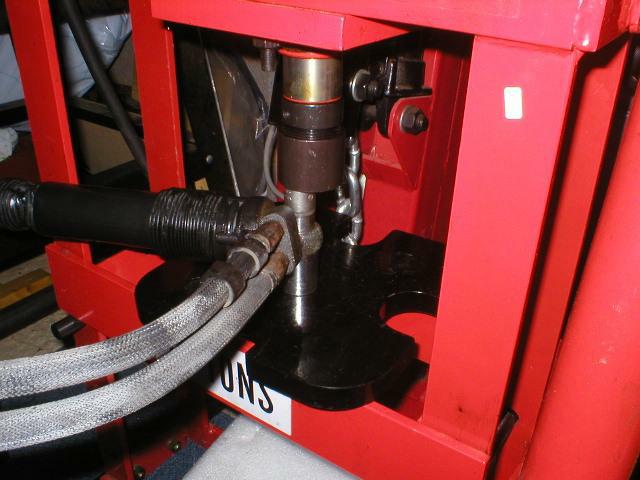
If necessary, press out the ram bush in the eye of the ram using a press. use the same technique to press in a new bush. A new ram should come with a new bush already fitted but if not, or you are using a second-hand ram with a duff bush, it will need pressing. It is jolly tight in there although it can be done in-situ or on the bench using a 16mm and 21mm socket as mandrels.

Pressing Out the Ram Bush
-
It is likely you will have to transfer theflexible pipes from the old ram to the new. Undo them with care as it is impossible to get a flare-nut spanner onto them so an open-ender must be used. Ensure the spanner is a very snug fit and go easy!
-
Begin reassembly by feeding the ram supply pipes up and towards their support plate. teasing and holding them, replace the clamp plate and nut and carefully tighten the clamp plate nut until the pipes are correctly clamped on the support plate. Ensure you don't snag the leakoff pipe.
-
Screw in and fully tighten the RH hydraulic union. This is tricky and you'll need to move the position of the supply pipe until a point is found when the 17mm union will happy screw home. Tighten it fully now using a flarenut spanner whilst counter-holding the flexible pipe hexagon.
-
Replace the steel pipe you removed earlier between the LH flexible pipe union and the Activa Sphere block. Fully tighten the unions.
-
Tighten the three nuts securing the pipe support bracket to the front of the hydractive sphere block.
-
carefully thread the leaksoff pipes through the rubber bands on the LH feed pipe and reconnect the leakoff pipe to the ram. Take great care doing this. I find it best to position both bands at the base of the pipe, feed the leakoff pipe through them and then reposition the bands on the pipe so that one is near the base and the other about half-way up the pipe.
-
Nip up the Activa Sphere bleed nipple and replace its dust cap.
-
Replace the tie-bar and spare wheel cradle after you have run the hydraulics back up to presure (don't forghet to nip up the 12mm bleed screw on the pressure regulator!!!) and have checked for leaks.
-
It is a good idea to do a good bout of "Citarobics" to purge any entrained air out of the system..
This is the last page. All the difficult work is now done and thuis page deals with the ram bush and reassembly, which generally, in the words of the BoL is a reversal of disassembly. Not quite but the text will reveal the ppoints to watch.

