Peugeot 206 1.4 Cambelt Replacement: Page 1

By cambelt replacement standards, this is a nice, easy one and can be fully completed in a morning.
in addition to the normal hand tools, all this is required is a set of Torx bits (T20 and T40), a large pair of adjustable spanners that open to at least 27mm and a 1/4" drive socket set for adjusting the belt tensioner. Although a "SEEM" gauge is shown in use for setting the belt tension, this tool is not essential.
-
The first job is to jack and support the front of the car and remove the offside (RHD) roadwheel to expose the cambelt side of the engine.
-
Remove the wing mudshield. This is secured by two T20 Torx screws into the front bumper and two "popper" fasteners, one at the top and one on the chassis member.
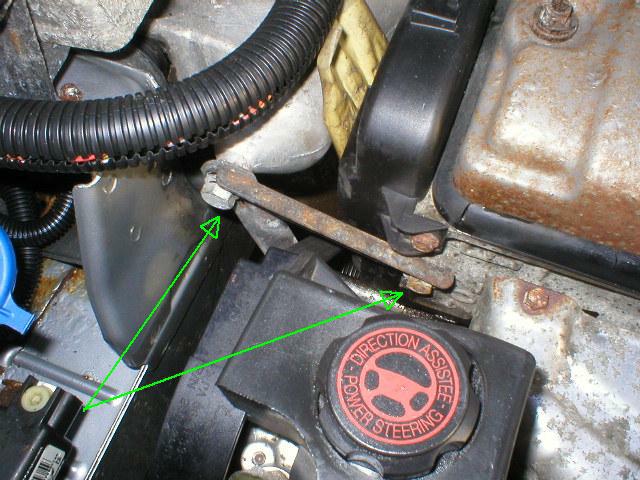
Engine Steady Bars
-
Remove the engine top mount steady bars as identified by the green arrows in the picture. It is secured by three nuts, one down below not shown in the picture.
-
Remove the top cover as shown in the picture below. It is retained by two 10mm bolts and pulls straight up.
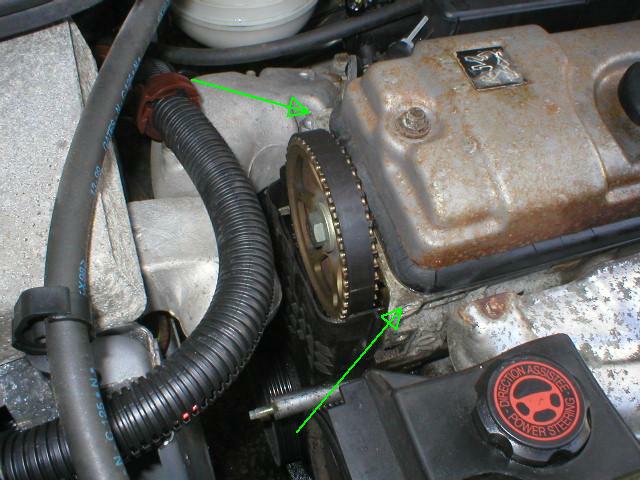
Cambelt Top Cover
-
Time now to remove the auxillary belt. The belt is tensioned by a roller that looks like an eccentric but it is not. It's a clever arrangement whereby the roller runs up and down a rack and pinion to tension the belt. To let off the tension, loosen slightly the T40 Torx screw in the cente (green arrow). DO NOT loosen this screw by any more than about half a turn. Now, using large adjustables, rotate the large hexagon (red arrow) to releive the tension in the belt. Remove the belt.
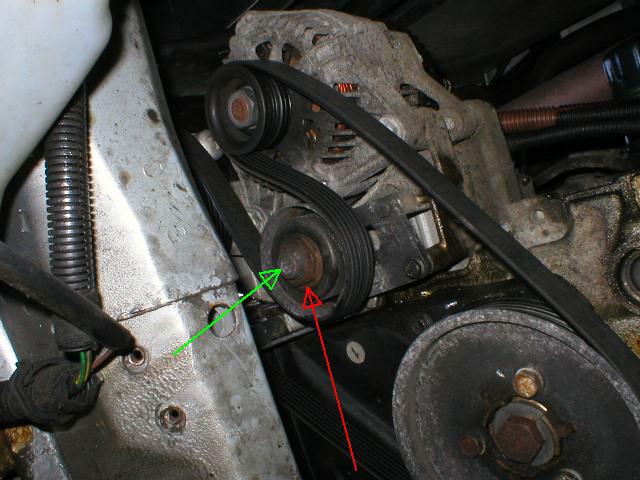
Auxillary belt Tensioner
-
The tensioner and its bracket can be left in place although in all the following photos it is removed. It was done solely to make the pictures a little clearer. Next up, remove the cranksaft pulley. It is secured by three 10mm bolts around the periphery of the large middle bolt. DO NOT touch the large middle bolt. After removing the three small bolts, the pulley will pull straight off easily.
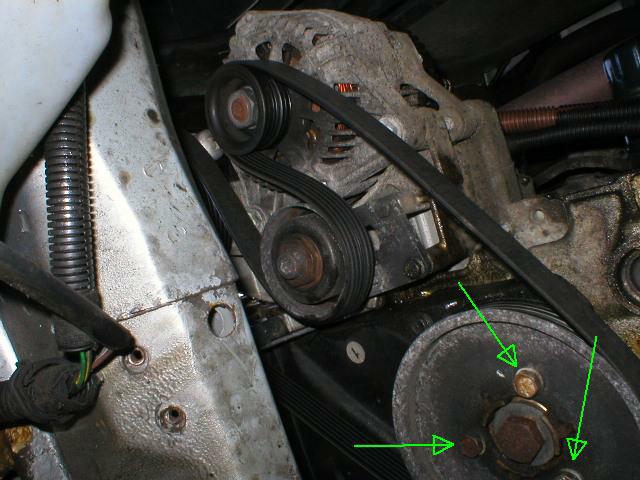
Crank Pulley Bolts
-
Now the lower cambelt cover may be removed. It is secured by three small bolts at the bottom and one 10mm bolt at the top. The top bolt is hard to see and a little inaccessible. The following pictures show the location of the bolts. The top 10mm bolt is most easily removed using a cranked ring spanner. Remove the lower cambelt cover. It is easily removed but may need a little "teasing" to release it from the top.
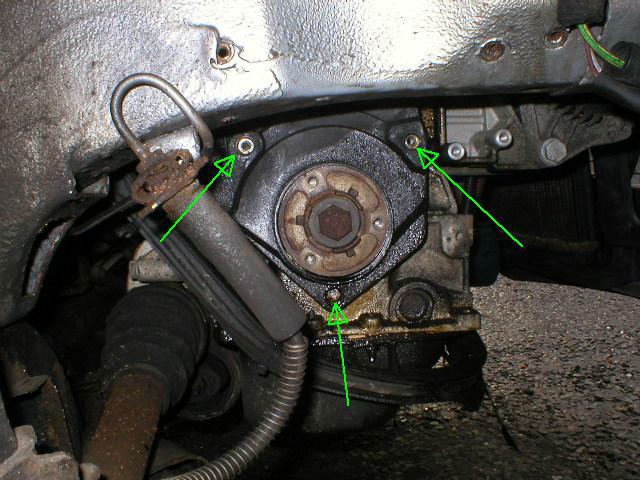
Bottom Cambelt Cover Bolts
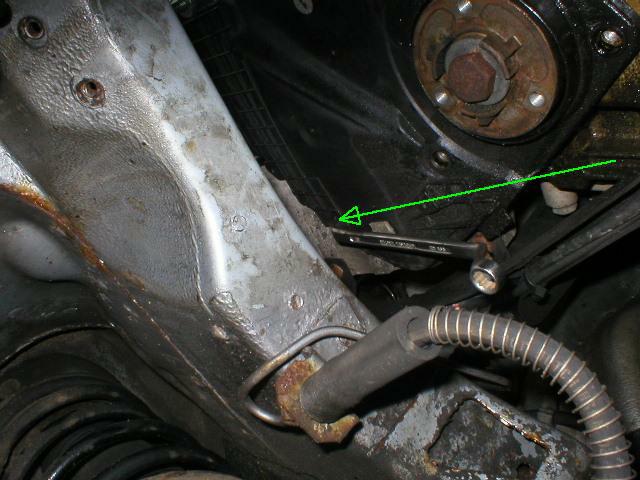
The top bolt retaining the bottom cambelt cover
-
Now is a good time to drain the coolant. Place a large tray under the radiator, open the drain tap and remove the cap from the expansion bottle.

